November 30th, 2011 · Comments Off on Curried Lentils and Sweet Potatoes
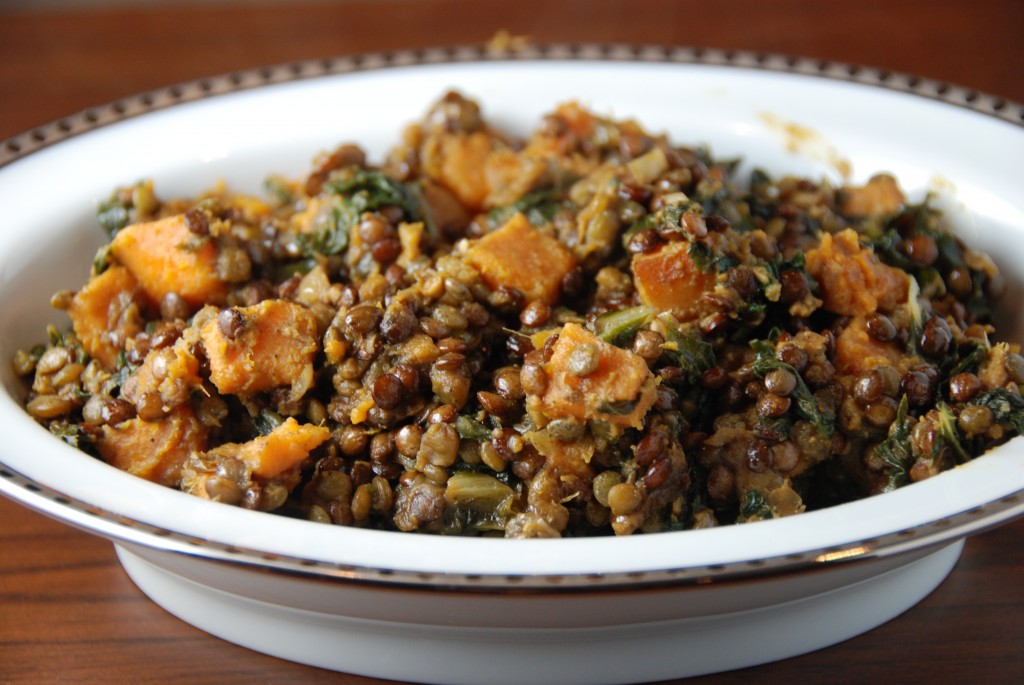
I need to cook with Indian spices more often. The smell that fills the apartment is warm and inviting. The food follows suit.
When I set out in search of a lentil recipe a couple of weeks ago, it wasn’t an unseasonable balmy 60 degrees. For whatever reason, curried lentils scream autumn and winter a lot louder than spring or summer, and I wanted something hearty and wholesome. Something flavorful, but not too spicy. The moment I saw this recipe I had eyes for no other.
Sweet potatoes. Swiss Chard. Cumin. You had me at . . . well, frankly all of it.
The original recipe suggests cooking the potatoes with the lentils from the get-go, but this rendered them too mushy and made stirring the dish difficult while trying to keep the potato cubes intact. I’ve adjusted for that in my adaptation below.
I urge you to try the dish before you add the lime, or maybe set some un-limed lentils aside, to do a little taste test. Citrus and acid are never a bad thing, but with this dish I wondered if it didn’t overpower the subtly of the spices.
When it turns to winter, and trust me it will, give this recipe a try.
Curried Lentils With Sweet Potatoes and Swiss Chard
Adapted from The New York Times
Makes 4-5 side-dish servings
1 tablespoon extra virgin olive oil
1/2 medium onion, chopped
3 garlic cloves, minced
1 1-inch piece fresh ginger root, peeled and grated
3/4 teaspoon garam masala
3/4 teaspoon curry powder
up to 1 jalapeño pepper, seeded if desired, then minced (depending on desired spice level)
2 to 3 cups vegetable broth as needed
1 pound orange-fleshed sweet potatoes, peeled and cut into
1/2-inch cubes (about 4 cups)
3/4 cups dried lentils (I used French lentils)
1 bay leaf
1 head Swiss chard, center ribs removed, leaves thinly sliced
1/2 teaspoon kosher salt, more to taste
1/4 teaspoon ground black pepper
Finely grated zest of 1/2 lime
Juice of 1/4 lime
1. In large saucepan, heat oil over medium heat. Add onion and saute until translucent. Add garlic, ginger, garam masala, curry powder and jalapeno. Cook, stirring, for 1 minute.
2. Stir in 2 cups broth, lentils and bay leaf. Increase heat to high and bring to a boil; reduce heat to medium, partially cover, and simmer for 20 minutes.
3. Add sweet potatoes and simmer for another 10-15 minutes. (If lentils seem dry, add up to 1 cup stock, as needed.) Stir in chard and salt and pepper, and continue cooking until lentils and potatoes are tender and chard is cooked.
3. Just before serving, stir in lime zest and juice.
Neighborhood: Veggie Sides
October 23rd, 2011 · Comments Off on Spinach and Chickpeas
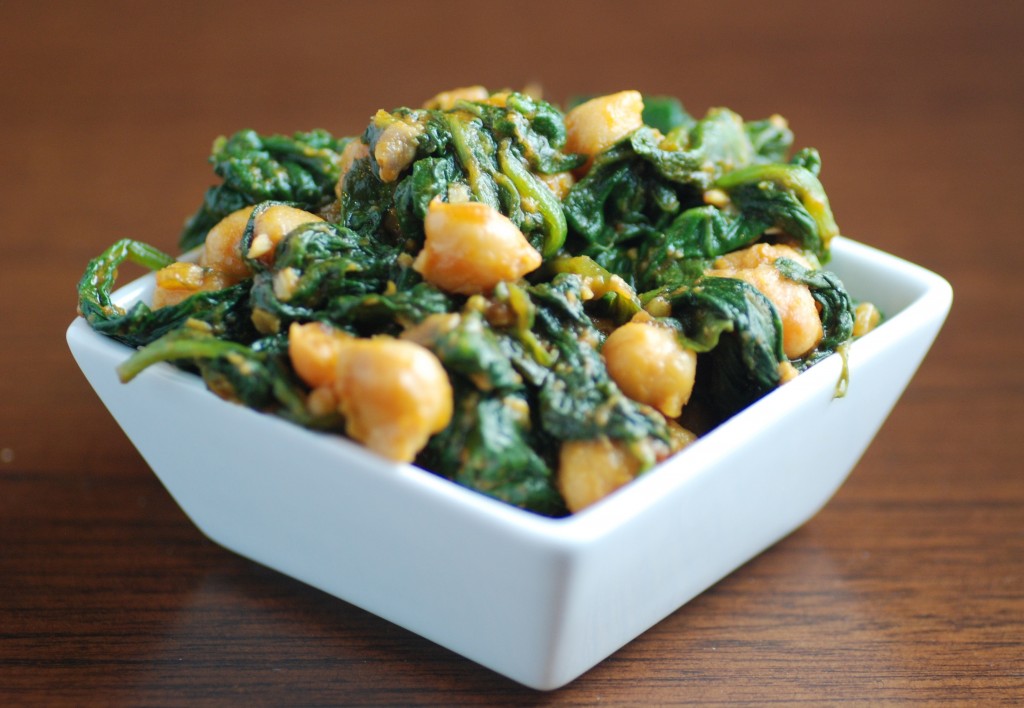
Every meal deserves a side of greens, whether it be a simple arugula salad or something more complex, like this dish (which I make with kale so often these days, it’s almost embarrassing). Greens supply crunch and acid. They complement any protein – whether it be pork, beef, fish, or poultry. No matter how much you amp them up with flavor – sweet, spicy, smoky, salty – they never overpower anything else on the plate. And, they don’t need a lot of fatty ingredients to be rich and decadent. Their only downside? They get stuck in your teeth.
I am always on the search for new green-centric dishes and when I stumbled across this Spanish-inspired one on Smitten, I literally had to make it that night. It checked all my boxes: healthy and easy with a respectable list of spices.
It’s really, really good. It’s hearty and packed with the warmth of smoked paprika and cumin. It’s exotic enough to interest those who aren’t normally tempted by greens and delicious enough to impress anyone who can’t get enough of them. It’s a keeper.
Spinach and Chickpeas
Adapted from Smitten Kitchen
Note: I might top this with a handful of homemade breadcrumbs and also consider serving it as a appetizer on bread toasts.
1 15-ounce can of chickpeas, drained and rinsed
4 tablespoon olive oil
12 oz – 1 lb spinach, washed
1/2 – 3/4 cup tomato sauce
3 garlic cloves, thinly sliced
1/2 teaspoon ground cumin
Pinch of red pepper flakes
1/2 teaspoon smoked paprika (I used hot)
Salt and freshly ground black pepper
Lemon juice, to taste
Place a large saucepan over medium heat 2 tablespoons the olive oil. When it is hot, add the spinach with a pinch of salt (in batches, if necessary) and stir well. Remove when the leaves are just tender, drain in a colander and set aside.
Heat 2 more tablespoons olive oil in a frying pan over medium heat. Cook chickpeas, tomato sauce, paprika, garlic, cumin and pepper. Stir until the chickpeas have absorbed the flavors and are hot. Season with salt and pepper.
Add the spinach and cook until it is hot. Check for seasoning, squeeze in some lemon juice, and serve as a side or as an appetizer on bread toasts.
Neighborhood: Veggie Sides
October 10th, 2011 · Comments Off on Coconut Milk and Vegetable Quinoa
Looking for an excuse to dine out more often? Here’s one: inspiration!
Similar to the White Bean Bruschetta, this dish was inspired by a great restaurant meal. This one came care of Talula’s Garden in Philadelphia. A quinoa and veggie ensemble (that the chef was kind enough to put together for my vegetarian sister-in-law) was the best dish on the table. It put my pappardelle with rabbit ragu to shame.
The secret ingredient? Coconut milk. Thai meets quinoa. Brilliant.
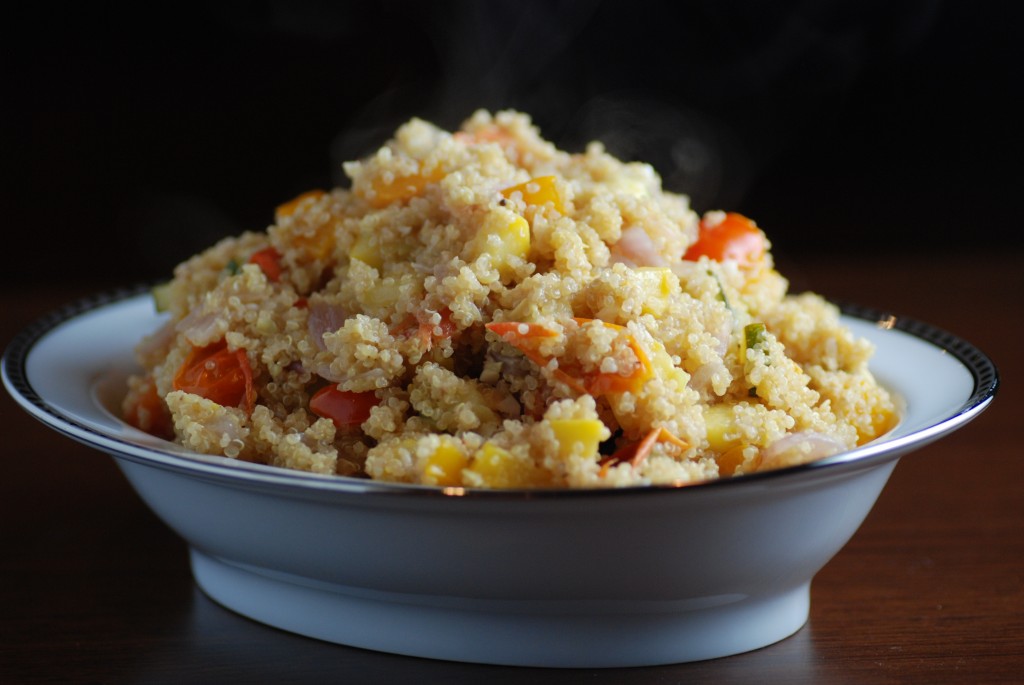
The quinoa was creamy, but still retained that wonderful bite that is so special to the uber-healthy grain. The vegetables added color, crunch, and diversity of flavor, without overwhelming any aspect of the dish. In my rendition, the red pepper flakes were essential, adding a very subtle heat.
The dish boasts a complexity of flavors that is very out-of-whack with how easy it is to make, it is insanely healthy, and tastes fabulous. It’s perfect for a weeknight side dish and you’ll love having leftovers for lunch. It was great with salmon, though I imagine it would pair well with any flavorful fish or shrimp. Next time I’d also make a simple salad to lend some acidity.
As always, add your own twist! Be inspired.
Coconut Milk and Vegetable Quinoa
1 cup quinoa
1/2 can lite coconut milk
1 cup water
3 to 4 cloves garlic, minced
1/2 teaspoon salt
3/4 teaspoon red chili flakes
red onion, cut to 1″ dice
zucchini, cut to 1″ dice
yellow squash, cut to 1″ dice
red pepper, cut to 1″ dice
yellow pepper, cut to 1″ dice
cherry tomatoes, halved
If your quinoa isn’t prewashed, rinse the dry quinoa in a fine mesh strainer under warm water.
Place rinsed quinoa into a medium saucepan with the coconut milk, water, garlic, salt, and chili flakes. Cover and bring to a boil, then turn heat to a low simmer and cook for about 15-18 minutes.
While quinoa is cooking, saute vegetables separately until they are cooked, but still have some crunch. If you prefer roasting them – that will work too!
When quinoa is done, remove pot from heat and let pilaf cool for a few minutes. Spoon in desired amount of vegetables and gently stir to combine.
Neighborhood: Starchy Sides · Veggie Sides
If you live in NYC, or have visited NYC, and haven’t eaten at Po in the West Village, you are missing out. Mario Batali was involved when the restaurant first opened, but he has since moved on. I’m a Batali fan, but in this instance, he hasn’t been missed.
Po is an authentic, quaint, and delicious Italian restaurant. The still too-loud soundtrack plays slightly better tunes than at Babbo. There are no cookbooks for sale, though this white bean bruschetta is straight out of the Po playbook.
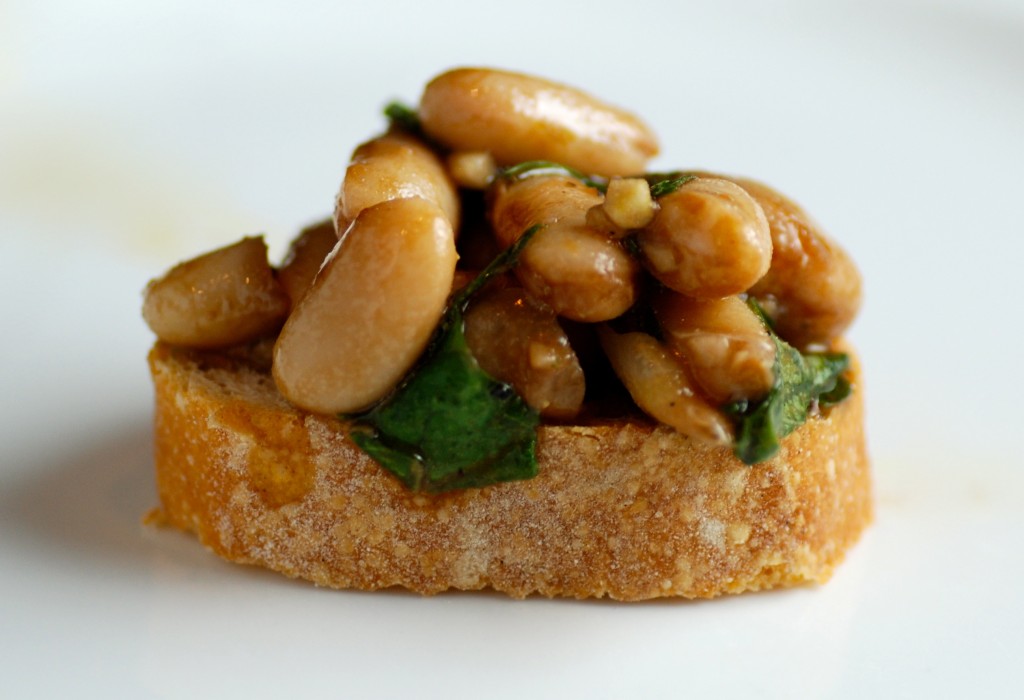
After a couple of dinners at Po, where big slices of peasant bread topped with cannellini beans arrived at my table, I realized I had to try and make them at home. They’ve since become a standby appetizer for me – they’re elegant, satisfying, and oh-so easy to make. It’s hearty comfort food, dressed up for company. Whenever I serve them, I get oodles of compliments.
The bad news is that anyone who asks for the recipe realizes how easy they are to make. The good news is now you do too!
This is one of those recipes that comes out slightly different every time. Sometimes it’s a little more garlicky. Other times a little more acidic. Regardless, it’s always, always good. Taste and play as you go.
White Bean Bruschetta
Makes 8-12 bruschettas depending on your bread size
1 cup cooked cannellini beans (white kidney beans), if using canned, they must be drained and rinsed well
3 tablespoons extra-virgin olive oil
2 tablespoons balsamic vinegar
1/2 teaspoon hot red pepper flakes
2 tablespoons chopped basil leaves
2 garlic cloves, finely chopped
Salt and pepper
French Baguette, sliced to 1/2″ thickness
In a bowl, gently stir together the beans, olive oil, vinegar, red pepper flakes, basil, and garlic. Season lightly with salt and pepper. Let it sit in the refrigerator for as long as possible, at least a few hours.
Sliced bread can be grilled or toasted. Spoon bean mixture on to toasted bread and serve immediately.
Neighborhood: Homecooking
September 26th, 2011 · 1 Comment
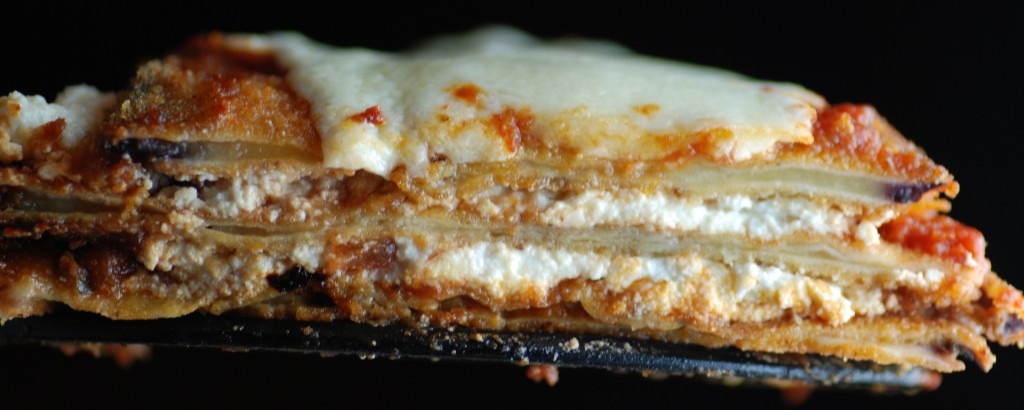
A couple months ago I introduced you to these and shared my amazement that a veggie sandwich could be so hearty, delicious, and completely satisfying. The tale of this here eggplant parm boasts a similar theme.
Chicken parmigiana used to be one of our go-to meals, until my husband suggested we start subbing in eggplant for some of the chicken. Smart man! It didn’t take long to realize the eggplant version was better. It had deeper and richer flavor. Eggplant takes on a lot of delicious moisture (read: oil) when it’s pan fried. This helps to make the dish more decadent and balanced as it doesn’t require the heavy dose of tomato sauce that chicken parmigiana often does.
The problem was in the eggplant parmigiana’s traditional form – one slice of eggplant covered with sauce and melted mozzarella. It lacked heft. It not only looked meager, but we had to eat an entire large baking dish of it to feel satiated.
Enter the stack.
I tried layering the eggplant into a more lasagna / strata-like dish to excellent results. It took on a more rustic, appealing, and substantial aesthetic. But, it was still missing a little something-something.
Enter the ricotta cheese.
And viola, the ideal eggplant parm reincarnation was born.
I not only love how the individual stacks look, but using the slice of eggplant as your only workable surface promotes balance. There is less temptation to pour over a ton of sauce.
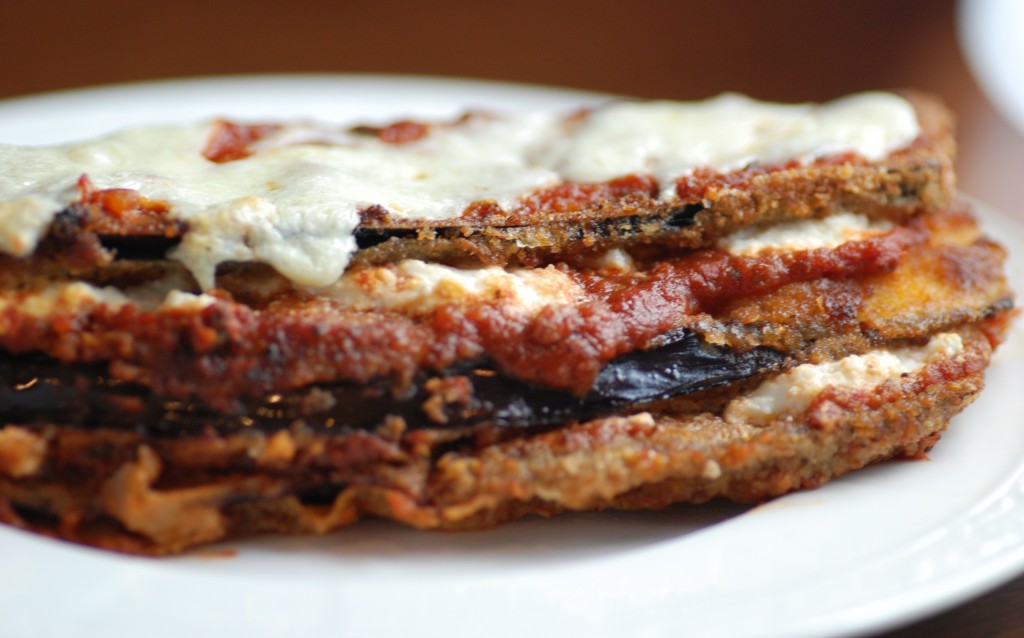
Play around with this idea to build your own strata or stack. This dish goes fabulously well with a simple green salad and some delicious bread. It can also be served as a side dish.
Eggplant Parmigiana Stacks
The recipe makes three, 3-layered, 6-inch long stacks. Good for a side dish for 4-6 or a main for 2-3.
1 large eggplant (or 2 smaller ones)
eggs, flour, and breadcrumbs for dredging
oil for frying
tomato or marinara sauce
ricotta cheese
mozzarella cheese, preferably whole milk
Slice the eggplant into 1/4 inch thick slices. Flour, egg, and dredge in breadcrumbs.
Pan fry eggplant slices in oil until nicely browned on both sides. My husband, the master of pan frying, uses a blend of olive and vegetable oil.
Spread a small amount of sauce in the bottom of a pyrex or baking pan. You can even use a baking sheet.
Layer the eggplant followed by the sauce (just a thin layer to cover the surface area of the eggplant), then the ricotta (just smear it on with the back of a spoon or your fingers). At the top layer, I just do eggplant, sauce, and then the mozzarella.
Bake at 350 until warmed through, about 20 minutes.
Side note: When it’s in the oven you can clean up the frying mess. When dinner is done there will be almost nothing to do!
Neighborhood: Veggie Sides
September 7th, 2011 · Comments Off on Padron Peppers
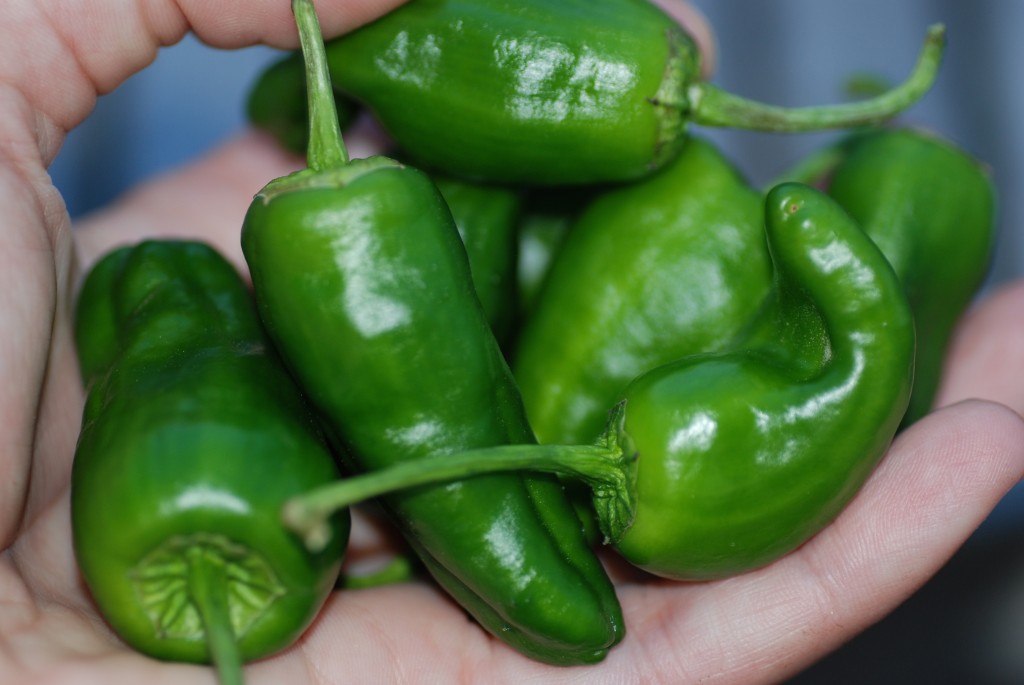
These little green gems are Padron peppers, named for the Spanish town of Padron from whence they came. We first fell in love with them at Txikito, a Basque restaurant here in NYC. (Txikito serves some of the best tapas we’ve ever had – put it on your list). Imagine our delight when we spotted a huge basket of these beauties at a farm stand this summer.
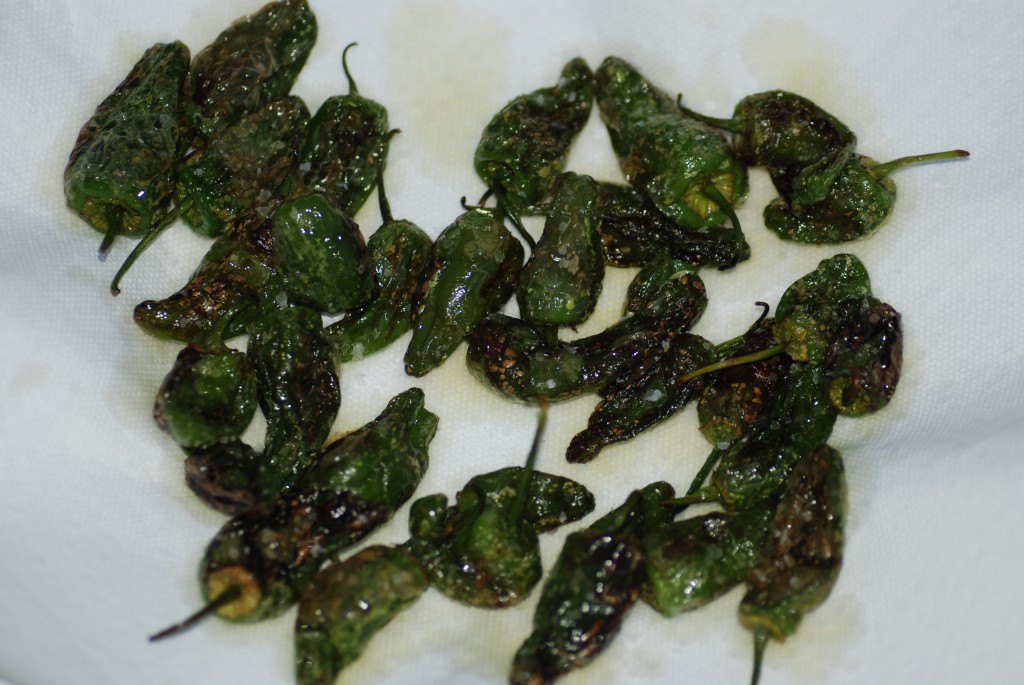
The peppers are traditionally prepared by pan frying them in olive oil until they’re cooked and blistered (about 3 minutes a side) and then sprinkling them with coarse salt. You can eat the entire pepper, stem and all (as I do), or discard the stem as you would a cherry. The peppers are mostly mild, almost sweet, but occasionally there will be a rogue spicy one that will make your eyes tear. It’s part of the fun.
A plate of Padrons is a simple, but surprisingly special nibble. They make a great pre-dinner snack, especially with some wine and friends.
If you see these beauties at your local green market or farm stand – grab yourself a generous bagful. You’ll be hooked!
Neighborhood: Veggie Sides
August 17th, 2011 · Comments Off on Hoisin-Honey Ribs
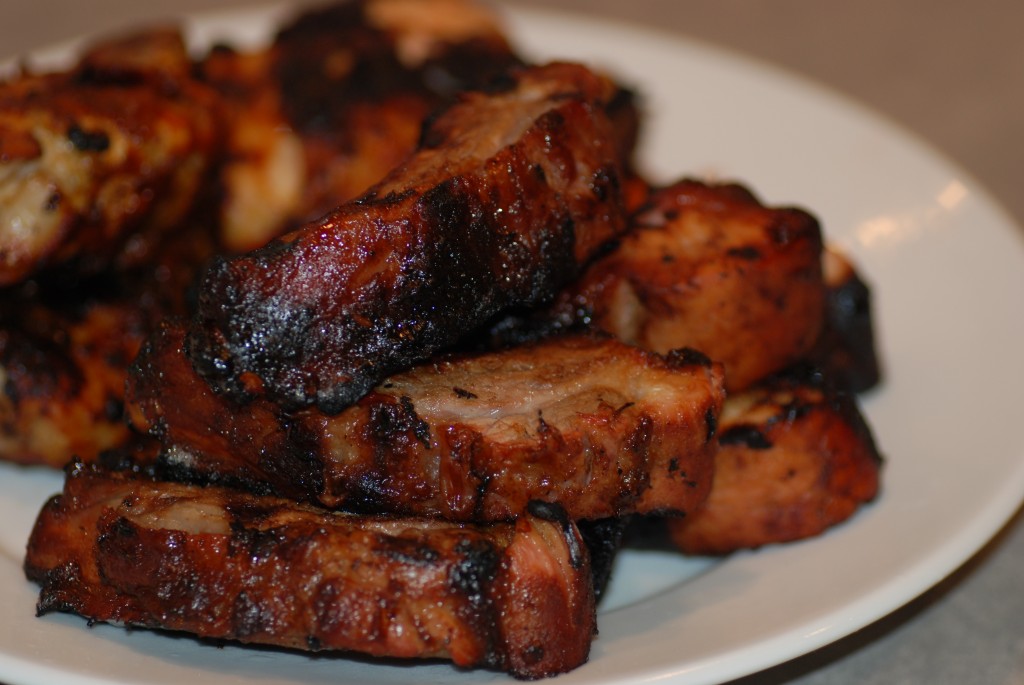
As the end of summer approaches, I turn some of my menu-making attention to my freezer, where since June, carefully packed meat has been waiting patiently for consumption. It is the casualty of buying without being sure of the final head count or a last minute change in dinner plans. When I lovingly tuck the saran wrapped and ziploced packages away, between homemade ice cream sandwiches and pints of Haagen Daaz, I promise them they’ll get their turn. For these ribs, the wait was well worth it.
I didn’t want the typical barbeque ribs. I didn’t want them to be too spicy, nor too sweet. I didn’t want them too be too dry, nor too wet. So when I read the ingredient list this for this recipe, it felt right. My instincts did not fail me – these were show-stopper ribs and now that I’ve had them, I’m not sure I’d make them any other way.
There is definitely some asian influence in the recipe and every few bites I would be reminded of those amazing Chinese pork spare ribs that would emerge from the foil-lined take-in bag that marked the Sunday nights of my childhood. These hoisin-honey ribs also open up tons of side dish options. You can get away with the typical barbeque stables, like grilled corn or slaw, or you could take it in a whole other direction with something like noodles with peanut sauce or homemade fried rice.
What’s in your freezer?
Hoisin and Honey Ribs
Adapted from Gourmet
Note: I doubled the below and used one portion for marinating and one for on-grill basting.
3 pounds pork ribs (we used loin ribs, but I imagine spareribs or babybacks would also be delicious)
1/3 cup honey
1/4 cup soy sauce
1 large garlic clove, minced and mashed to a paste with 1/4 teaspoon salt
1/3 cup hoisin sauce
1/2 teaspoon dry mustard
1/4 cup distilled white vinegar
Whisk together honey, soy sauce, garlic paste, hoisin sauce, mustard, vinegar, and black pepper to taste. Marinate ribs (still in rack form is good) in brining bag or pyrex, turning every so often for at least 1 hour or overnight.
Grill ribs at 250-300 degrees or lower for a couple of hours. The meat will be done more quickly than the cooking time, but the slow cook will impart more flavor.
According to Gourmet you can also boil and then bake these using the below directions.
Cut racks into individual ribs. In a pot of boiling salted water simmer the ribs, covered, for 30 minutes and drain them well.
In a large bowl whisk together the honey, the soy sauce, the garlic paste, the hoisin sauce, the mustard, the vinegar, and black pepper to taste, add the ribs, and toss the mixture well, coating the ribs thoroughly. Let the ribs marinate, chilled, for at least 1 hour or overnight.
Remove the ribs from the marinade, arrange them in one layer on the oiled rack of a foil-lined broiler pan, and broil them under a preheated broiler about 4 inches from the heat, basting them with the marinade, for 3 minutes. Turn the ribs with tongs and broil them, basting them with the marinade, for 2 to 3 minutes more, or until they are browned well and glazed. Discard the marinade.
Neighborhood: Meats
August 12th, 2011 · Comments Off on Quinoa and Black Bean Salad
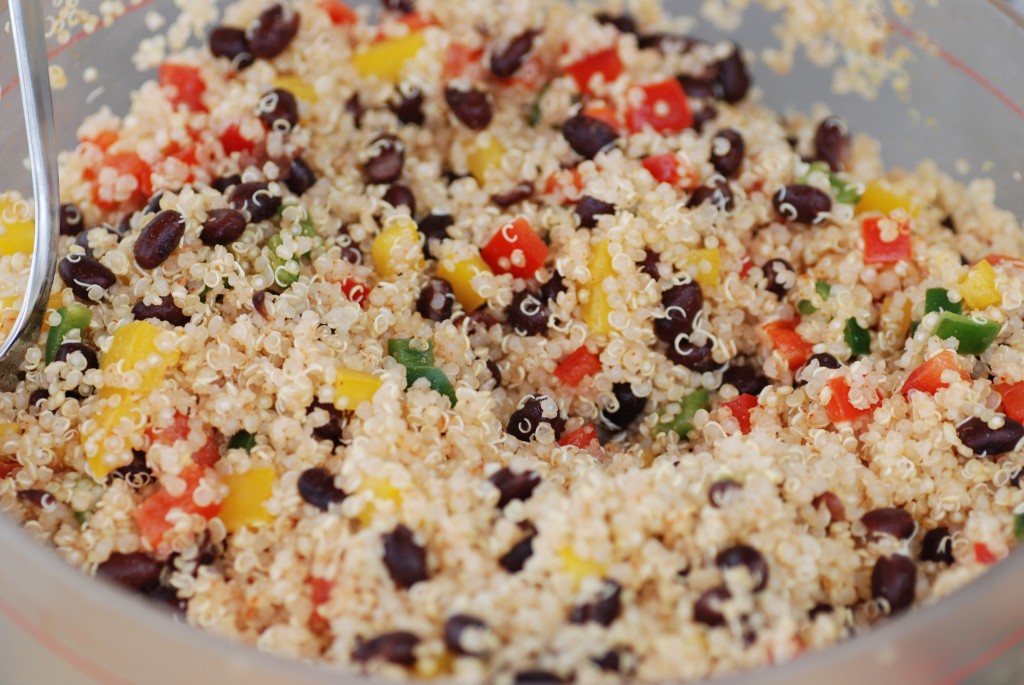
It’s hard to believe that something so pretty is also so good for you. If you’re in need of a light summer side dish, look no further. My mother-in-law sent me this recipe over a month ago and my only regret is I did not make it sooner.
Interestingly, it’s from a 1994 Gourmet issue when quinoa was still only available in specialty shops (there was even a note in the original recipe directing you where to find it). Now you can find the healthy grain almost anywhere (not to mention pre-washed). It’s less elusive than okra!
What I love most about this confetti salad is that every bite is chock full of ingredients. The ratio of quinoa-to bean-to pepper-to dressing is perfectly balanced and palate pleasing. There’s never a bite with too much quinoa. Never a soggy forkful. I jazzed it up with some extra spice and would recommend you do the same.
As with so many things, it was better the next day. The flavors were melded and more intense, but the vegetables were still just as crunchy and fresh. Though we didn’t have leftovers past day two, this salad would be an enviable addition to a packed work lunch.
Quinoa and Black Bean Salad
Adapted from Gourmet
1 1/2 cups pre-washed quinoa
1 can black beans, rinsed
1 1/2 tablespoons red-wine vinegar
1 red pepper, finely diced
1 yellow pepper, finely diced
2 jalapeños, seeded and minced
Dressing
5 tablespoons fresh lime juice, or to taste
1 teaspoon salt
1 1/4 teaspoons ground cumin, or to taste
cayenne, to taste
1/3 cup olive oil
In a saucepan of salted boiling water cook quinoa 10 minutes. Drain quinoa in sieve and rinse under cold water. Set sieve over a saucepan of boiling water (quinoa should not touch water) and steam quinoa, covered with a kitchen towel and lid, until fluffy and dry, about 10 minutes.
While quinoa is cooking, in a small bowl toss beans with vinegar and salt and pepper to taste.
Transfer quinoa to a large bowl and cool. Add beans, peppers, jalapeños, and toss well.
Make dressing: In a small bowl whisk together lime juice, salt, cumin, and cayenne and add oil in a stream, whisking.
Drizzle dressing over salad and toss well with salt and pepper to taste. Salad may be made 1 day ahead and chilled, covered.
Neighborhood: Starchy Sides
August 11th, 2011 · Comments Off on Grilled Halloumi
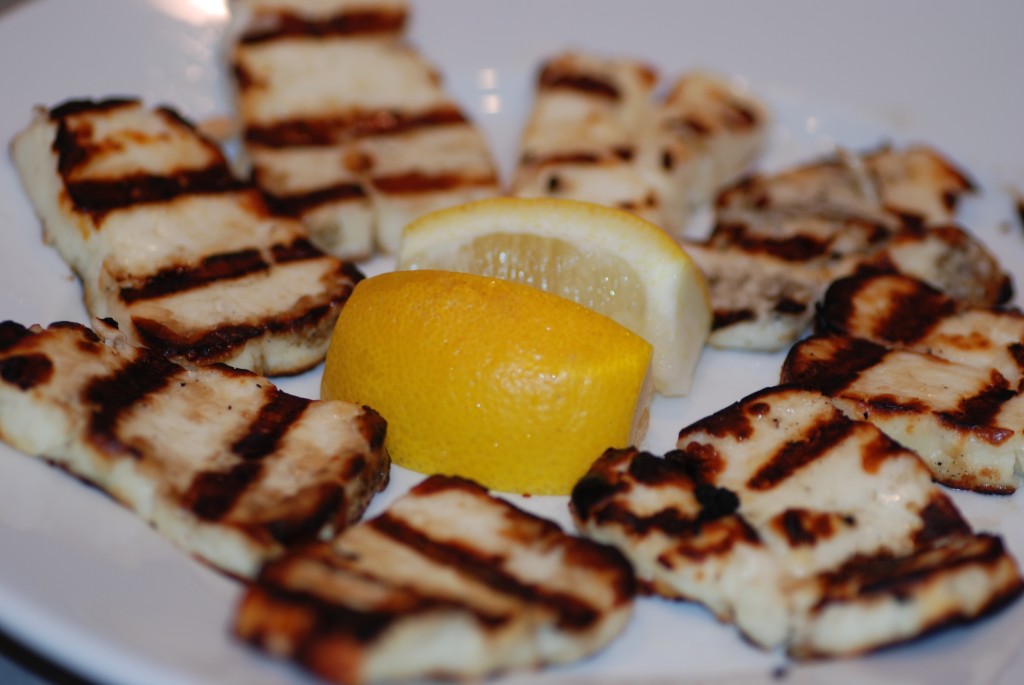
Have you met halloumi? Halloumi is a Greek cheese that has a very high melting point. Translation: it’s an ideal candidate for frying or grilling. It also has great flavor and texture. Think tofu meets feta, in the best way possible.
Grilled Halloumi makes a crowd pleasing starter. It can also be a last minute addition if you’re having a few unexpected guests and are worried the food you have planned won’t be enough. Dare I recommend that the humble and versatile Halloumi be stocked in your fridge for those very occasions?
Halloumi is rich and salty, both qualities which are perfectly tempered by the acidity of lemon juice. It has a rustic appeal and is also incredibly easy to prepare. You literally open a package, apply a knife, and head outside to the grill.
If you find yourself without a grill, halloumi can also be fried in a skillet with some lemon juice, butter, and maybe even some brandy (we’ve had it prepared this way at our friends’ Easter celebration and it is divine).
However you serve your halloumi, people will be happy.
Grilled Halloumi
Halloumi
Lemon
You should be able to find Halloumi in the cheese section of your food market. It comes pre-packaged and is likely near the feta cheese. One package is enough for 4-5 people.
Preheat grill for 10 minutes or so to get the grates as hot as possible (that’s how you get those nice grill marks).
Halve cheese diagonally, then cut each triangle into 1/3-inch-thick slices.
Grill cheese, turning once, about 3 minutes per side. You want to achieve those grill marks.
Remove from heat, plate, squeeze some lemon, and serve.
Neighborhood: Homecooking
August 10th, 2011 · Comments Off on Grilled Portobello, Provolone, & Chipotle Mayo Sandwiches
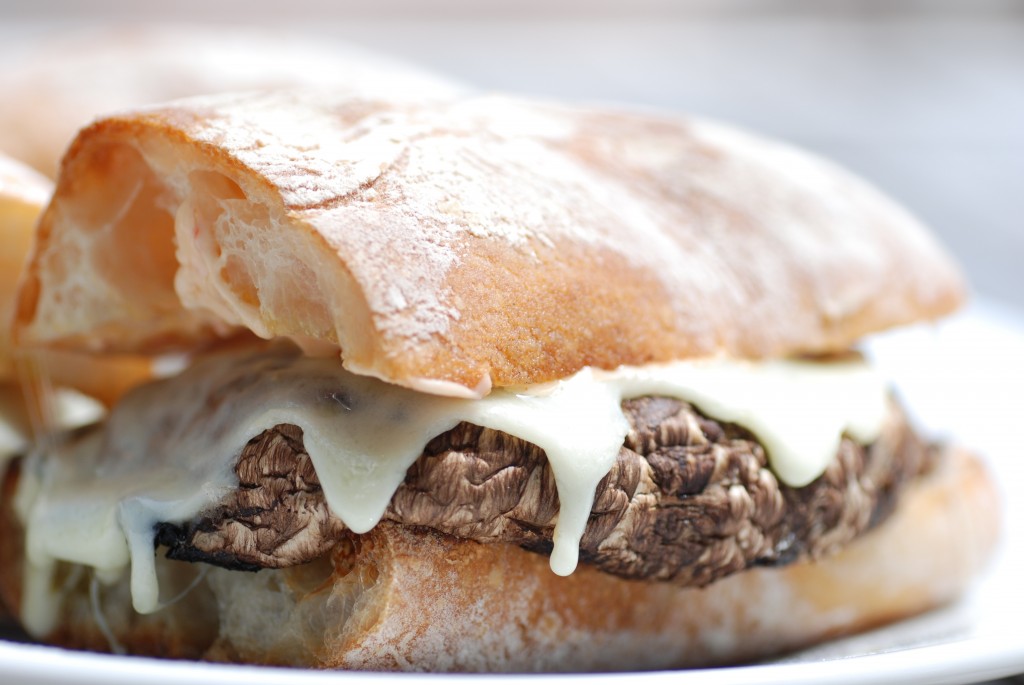
As much as I love vegetables, sometimes there simply isn’t a substitute for meat. This is not one of those instances. This ridiculously amazing sandwich is pure vegetarian, but trust me, you won’t miss the protein. Not for a second.
One of our summer staples used to be grilled ahi sandwiches with chipotle mayo. They were really, really good. Last year, when my vegetarian sister-in-law came to visit, we called an audible and made her one of these portobello beauties. Lucky for us, we also made an extra one for the rest of us to taste. It was so amazing that we haven’t made another ahi tuna sandwich since. This weekend a guest actually exclaimed, “oh my god” after biting into one of them. Yes, a mushroom sandwich can be that good.
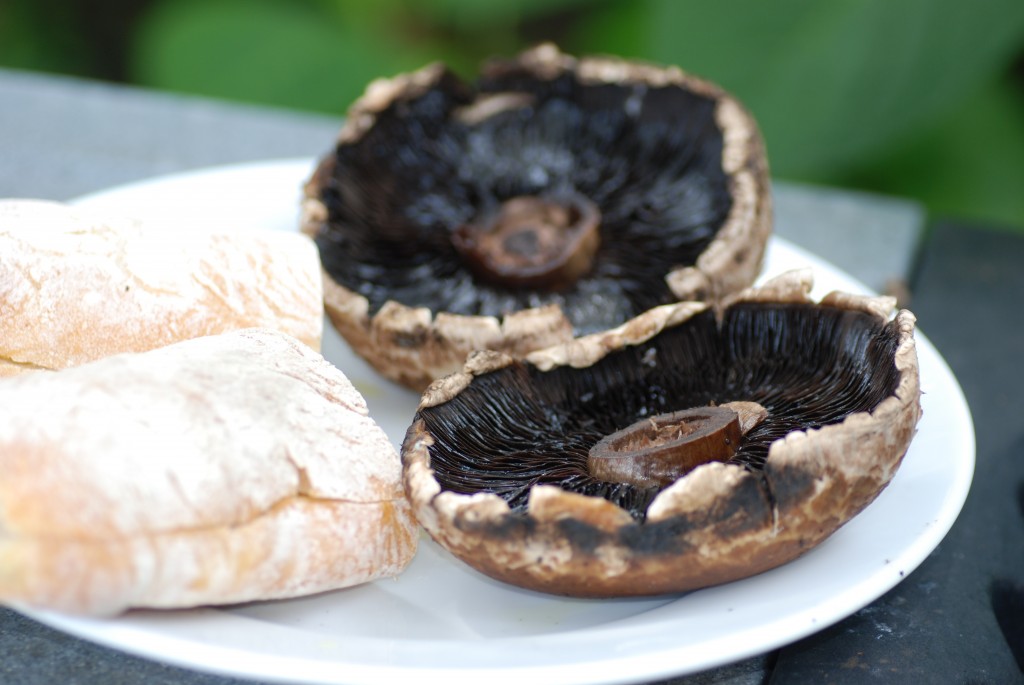
The grilled portobellos have so much heft and density, both in texture and flavor. The melted provolone adds some melty, salty goodness and the creamy and spicy chipotle mayo is what brings it all together. We’ve actually started making a full jar of the mayo to keep on hand for BLTs, turkey sandwiches, tomato sandwiches, and anything else we can dream up to slather it on.
Another key to this recipe is that the portobellos and ciabatta rolls be of the best quality you can find within a reasonable distance from your home.
Grilled Portobello, Provolone, & Chipotle Mayo Sandwiches
the best looking portobellos you can find
the best looking ciabatta rolls you can find
sliced provolone
mayo (I always use reduced fat)
chipotle peppers in adobo sauce
For the mayo: Chop the peppers, trying to keep the seeds out. Combine with mayo. Sorry – no amounts here, just eyeball and taste. You’ll probably need at least a cup for 5+ sandwiches. Remember, you can’t have too much of this mayo!
Cut the stems off the portobellos and wipe any dirt from their caps with a damp paper towel. Brush both sides with olive oil.
Cut the ciabatta rolls to the size that best matches your portobellos (sometimes you’ll want to cut and inch or a 1/3 off the roll, depending). Brush the insides with olive oil.
Grill the portobellos over medium-high heat, staring caps down and flipping once, until they’ve lost some of their juices and are cooked all the way through, about 4 minutes a side. Grill the oiled sides of the bread. Place a slice of provolone on top of every cap and remove from heat as soon as the cheese is melted.
Remove the bread from the grill and slather the insides with chipotle mayo. Place a portobello on each roll bottom and cover with its top.
Neighborhood: Homecooking
August 9th, 2011 · 1 Comment
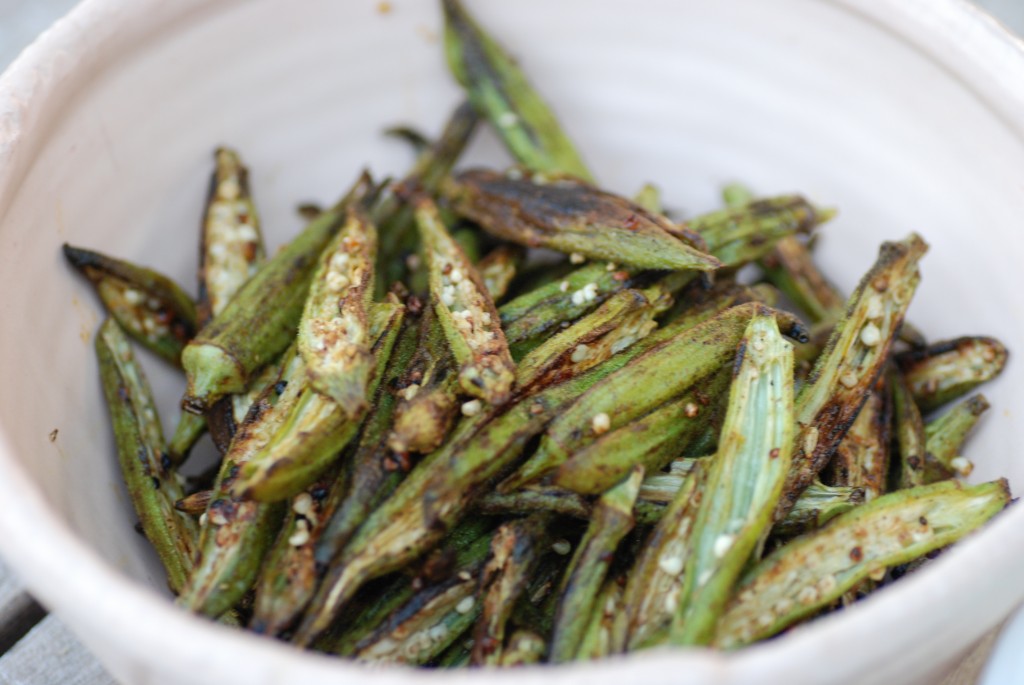
When I saw this recipe in Food & Wine I immediately ear-marked the page. It had all the makings of a pre-dinner snack: attractive, different, and simple to prepare. When it made the menu and I scribbled ‘okra’ on my shopping list, I had no idea of the ingredient-hunt that would ensue. Okra, as it turns out, is not so easy to find in my beloved New York. I struck out at the usually reliable (but you pay for it!) Dean & DeLuca and my sturdy back-up, Gourmet Garage. (I did not have a chance to visit a Whole Foods.) Out on Long Island, where farmers markets and specialty food shops abound, I still could not find the oddly elusive, fresh okra. So, for my first attempt at this recipe, I settled for the frozen kind, which care of Goya, are already cut into small pieces.
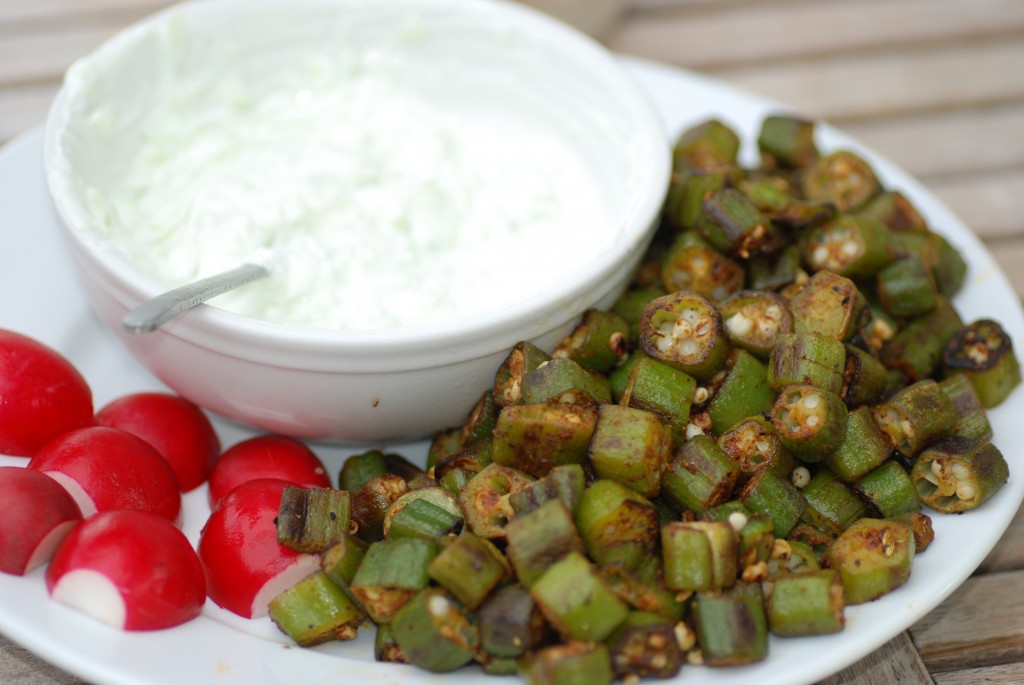
Though forks were needed instead of mere fingers, everyone thought the okra and accompanying yogurt dip were a lovely summer snack. The spice was light but satisfying. The yogurt was refreshing. The okra didn’t have any of the slimy characteristics that often mar its reputation and squelch its popularity. There was texture. There was crunch. The whole thing went along fabulously with a glass of white wine. My pursuit went into fifth gear. The dish was a winner, but now more than ever I needed to get my hands on the fresh stuff.
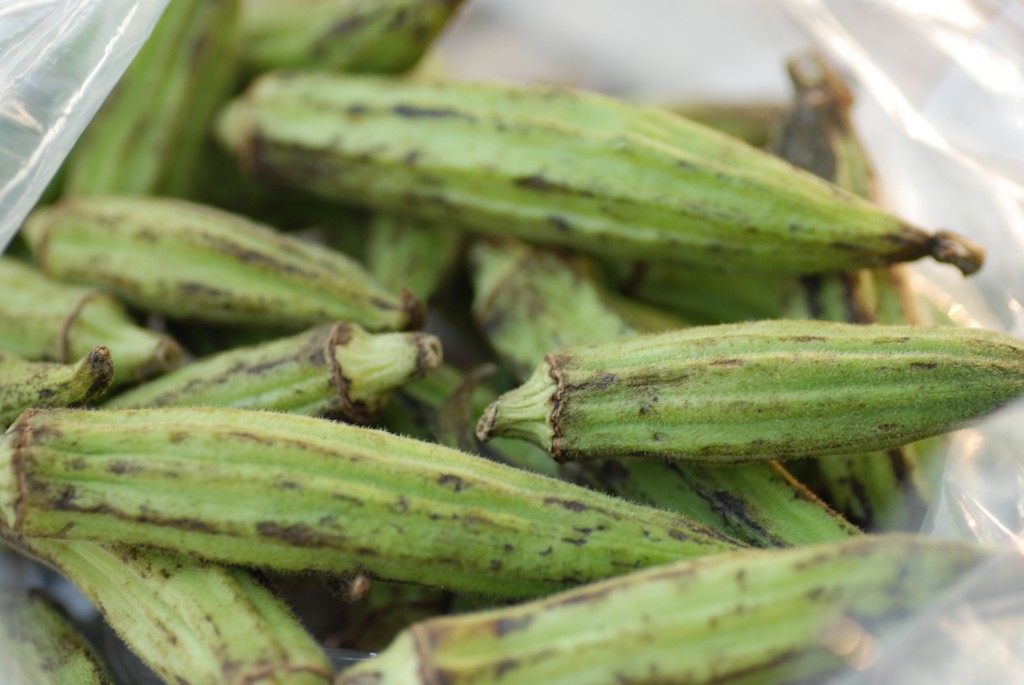
Every food store I went to I did two passes through the fruits and vegetable section. Sometimes I would track down the manager who usually informed me that they don’t carry it because no one buys it. Folks, you don’t know what you’re missing! Finally, a huge bin of it turned up at, weirdly enough, the butcher! They were already starting to brown on the edges (clearly suffering from a lack of consumer attention) but they would make it to our table that night.
They turned out just as I had hoped. My mother-in-law, who resides in the South, was here for the successful tasting and not but a week later emailed me a picture of the greenest, most vibrantly beautiful okra she had bought to duplicate this very recipe. She had found it at a farmstand in her hometown in Virginia.
Come on, New Yorkers, get your okra on!
Skillet-Roasted Spiced Okra
From Food & Wine
1 pound small okra, halved lengthwise
3/4 teaspoon hot paprika
1/4 teaspoon ground cumin
1/4 teaspoon ground coriander
1/4 teaspoon ground fennel seeds
1/8 teaspoon turmeric
Pinch of cinnamon
2 tablespoons vegetable oil
Salt
2 tablespoons fresh lemon juice
In a small bowl, blend the paprika with the cumin, coriander, fennel, turmeric, and cinnamon.
In a large nonstick skillets, heat 1 oil. Add the okra, cut side down, and cook over high heat for 2 minutes. Reduce the heat to moderate and cook until browned on the bottom, 4 minutes longer. Turn the okra and cook over low heat until tender, 2 minutes. Season with salt and sprinkle with the spice mixture. Cook, stirring, until fragrant, 30 seconds. Drizzle the lemon juice over the okra and serve.
Yogurt Dip
Greek yogurt (I used 2% Fage)
Shaved cucumber
Salt, pepper, and cayenne to taste
Just mix it all up and season until your palate says it’s right.
Neighborhood: Veggie Sides
August 7th, 2011 · Comments Off on August Pledge (and The Best Damn Onions Ever)
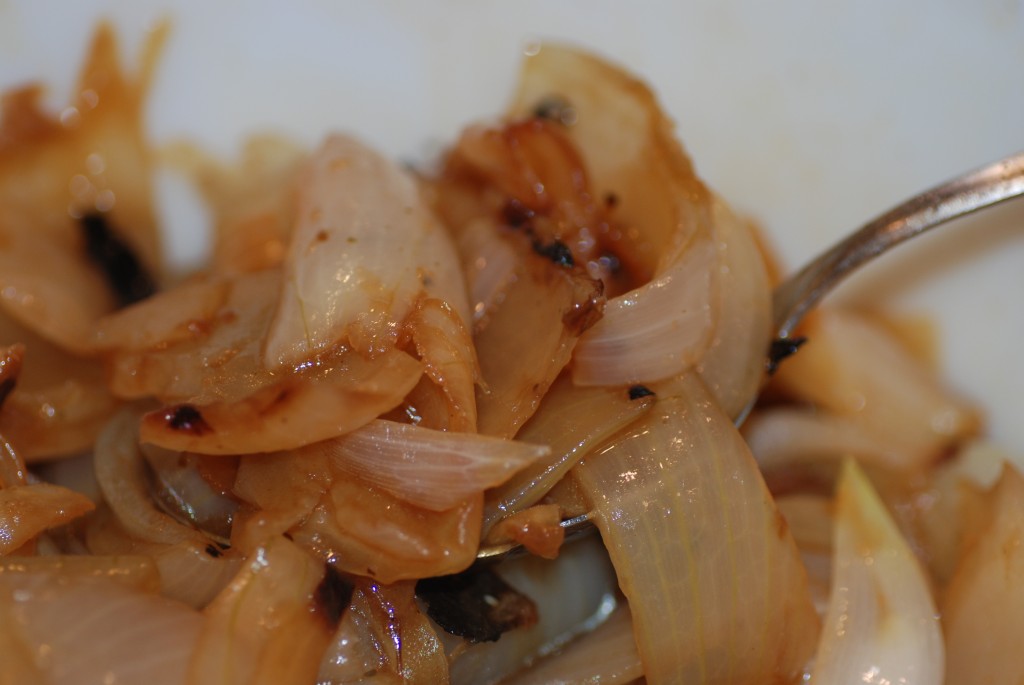
Has it really been three weeks since my last post? Rest assured, it’s not due to a lack of time spent in the kitchen or eating. Au contraire. The summer has been filled with so much sunshine and good eats that this here blog has suffered. That stops now. What’s the fun in trying recipes and snapping photos if they don’t get shared? Today commences my August Pledge to my dear eater and reader friends: I will post every day this week (Mon-Fri), followed by a weekly post until Labor Day. Yep – that’s right. My feet are to the fire. Let’s jump in with The Best Damn Onions Ever.
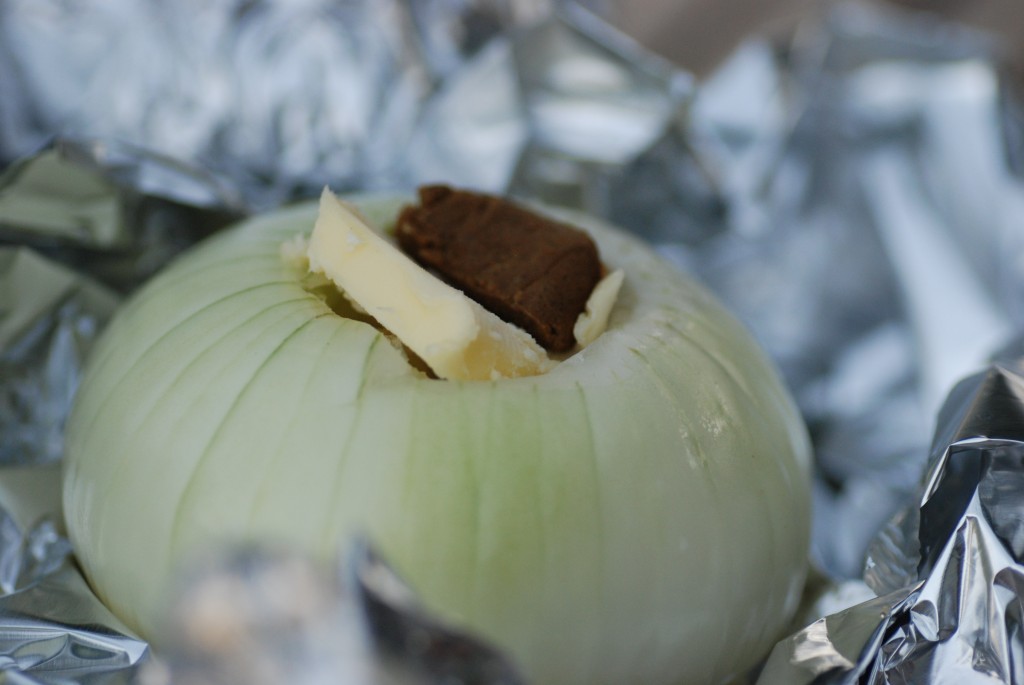
The Best Damn Onions Ever first rocked my taste buds over a decade ago, when a friend prepared them one summer evening in Lake Tahoe. I was oh-so-skeptical that a vidalia onion stuffed with butter and bouillon could live up to the level of deliciousness I was promised. I was oh-so-wrong.

These simple stunners are insanely easy to prep and cook, and anyone who tries them will love them. Their flavor is robust, but not overpowering. Their silky and slightly crunchy texture is perfection. They are a great side dish for steak and pork, but can truly complement any protein. (In the off chance we have leftovers, they have even made their way atop Sunday hot dogs.)
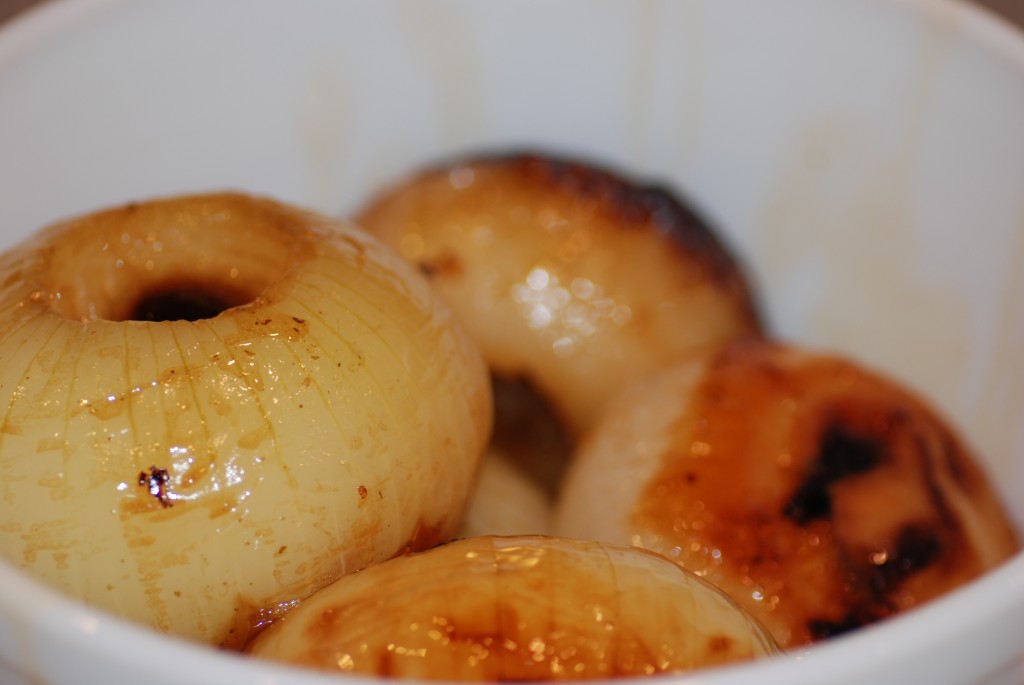
There’s still time to make them this summer and trust me, you’ll want to do it soon, so you can make them again. And again.
The Best Damn Onions Ever
vidalia onions (I usually get one less than the number of people eating)
unsalted butter
beef bouillon (I have used vegetable bouillon when serving vegetarians, but it definitely isn’t as flavorful)
bread for jus dipping
Peel onions and cut 1/4″ off the top and just enough of the bottom to get rid of the root. With a spoon, core out a hole in the onion. It doesn’t have to be too deep as you don’t want to break through the onion’s underside.
Stuff the core with a tablespoon of butter and half a bouillon cube. Wrap in foil.
Cook over medium-high heat on the grill for 35-45 minutes (they’re protected by the foil and hard to overcook). You can leave them in the foil until just before you’re ready to eat.
Unwrap them (careful – they’re hot!) in a bowl. Once all the onions are in the bowl. Cut them in quarters. Mix well.
Neighborhood: Veggie Sides
July 13th, 2011 · Comments Off on Soft Shell Crabs
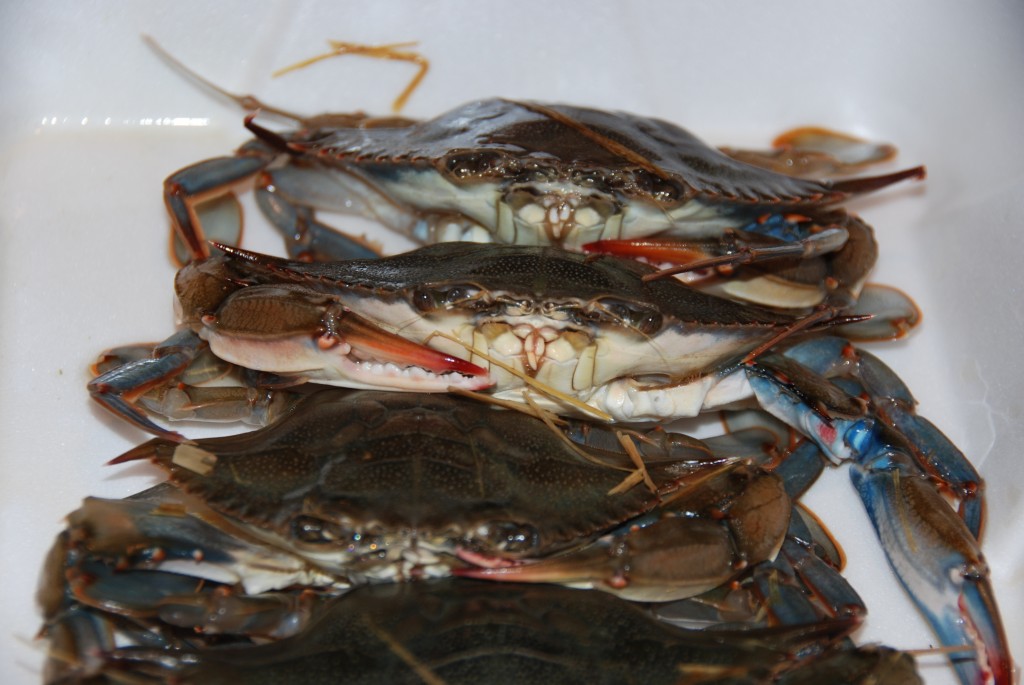
Just as I love to roam a farmer’s market, I equally love going to the fish monger. Women and men in rubber boots and coveralls cheerily chat with you about what’s the freshest, what they’re almost out of, and even the best way to prepare it. You can select the exact fish you want and watch them clean and fillet it. It smells like the ocean. You feel like a chef. It makes me happy.
A couple of weekends ago, we cooked our very first soft shell crabs. If you know me, the fact that this was the first time I had attempted this at home might seem crazier than the idea that up until last week I hadn’t made bruschetta. Soft shells are my absolute favorite. (I often make a new year’s resolution to eat more of them.) Making them at home was somehow intimidating, but when they stared up at me from their ice bed at the fish monger and my favorite lady in rubber boots told me they had just come in off a local fishing boat, I knew the time had come.
Soft shells are not a type of crab, but rather a phase of the crab’s life after its exoskeleton has molted, leaving a soft shell behind. In the United States soft shells are usually blue crabs and the season for them is short.
Apparently cooking soft shells at home has a lot of advantages. Killing them (I’ll spare the details for the squeamish readers) just before you cook them translates to plump and juicy crabs. In a restaurant, even if they were killed a mere hour before they were cooked, they run the risk of drying out.
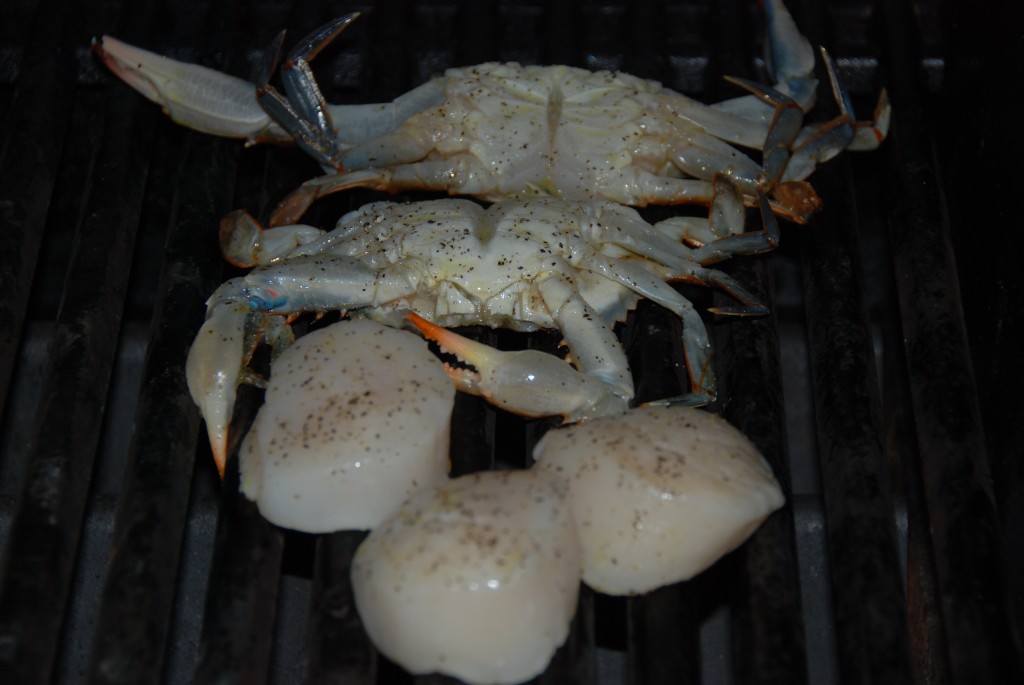
For a true experiment, we threw a couple on the grill (with some scallops to keep them company).
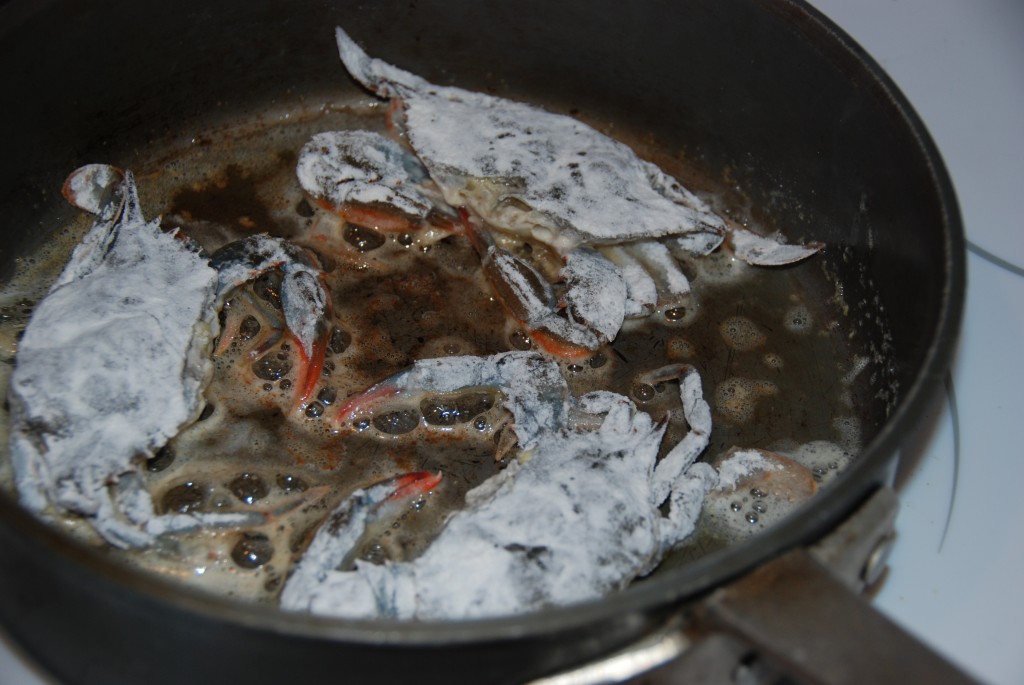
And dredged a few in flour before sauteing them in butter.
Though both versions were delicious, there’s just something special about a sauteed soft shell.
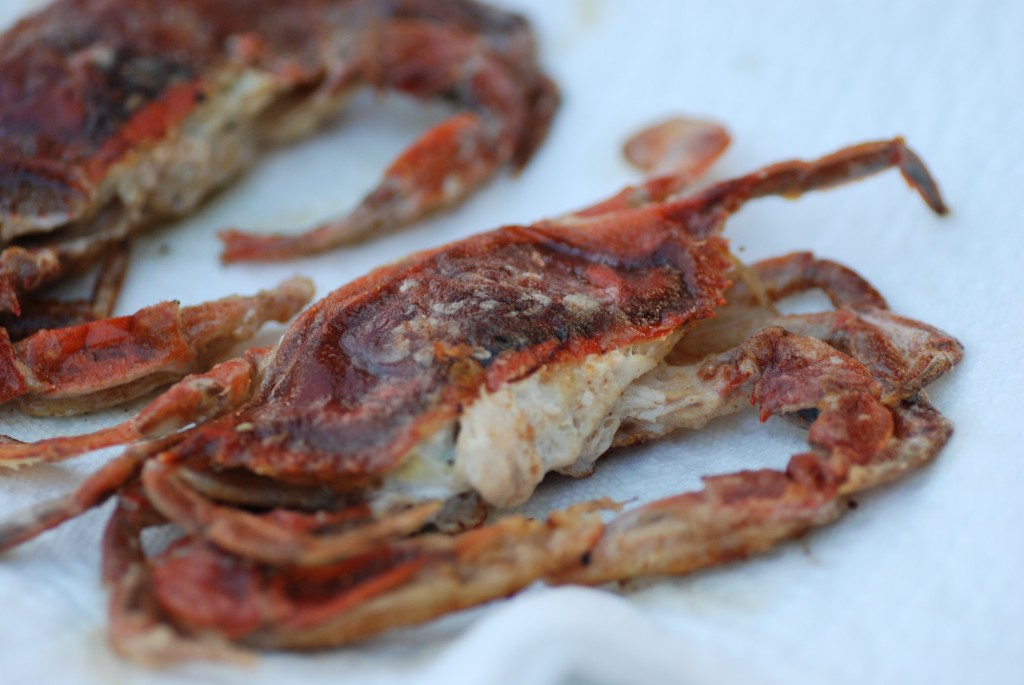
We’ve already made them again. I might just keep my new year’s resolution.
Neighborhood: Fish & Seafood
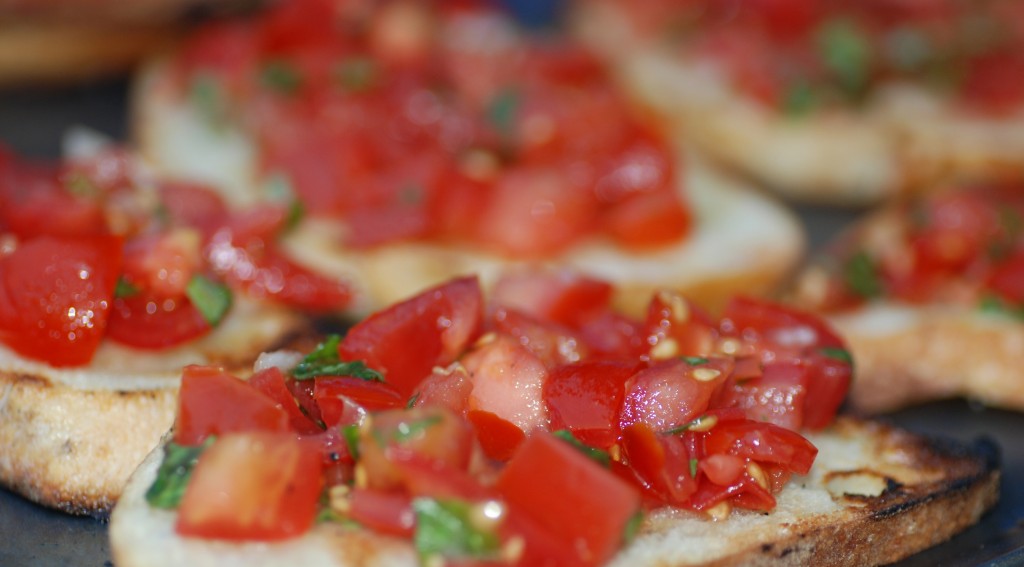
It’s that amazing time of year again. The sun is shining. The air is warm. The farmers’ markets are overflowing with all things summer. The vegetables and fruits look brighter and taste better. We are mere slaves to the ingredients. The tomatoes and corn choose us.
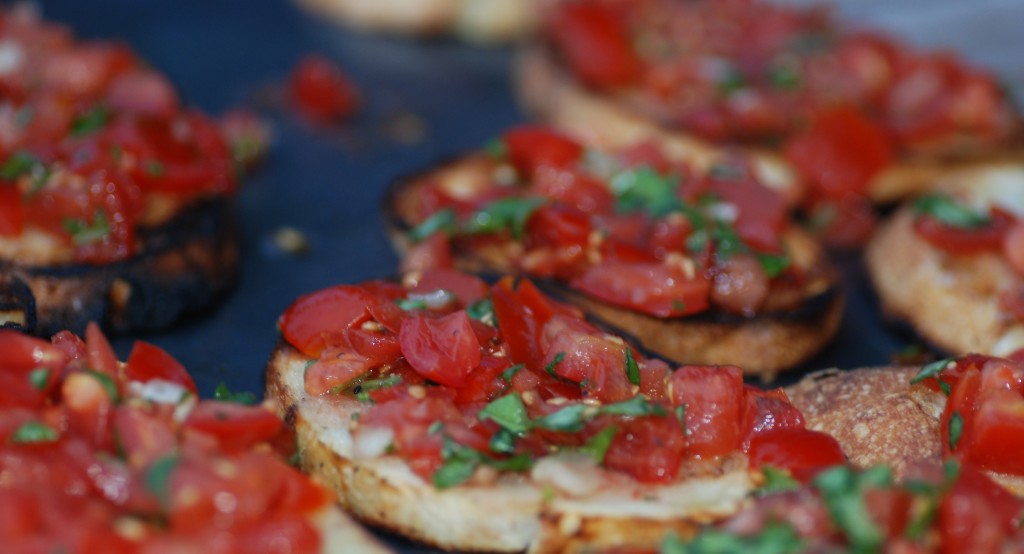
Until this weekend I had never made bruschetta. Crazy, right? It has all the characteristics I look for in a recipe – simple, crowd pleasing, and fresh ingredient-centric. It dawned on me at the farmer’s market as I hovered over the tomatoes and spotted the fresh basil in my periphery. I needed to make bruschetta. And soon.
So, with that, this weekend I made bruschetta (with help from some guests / sous chefs). We cut up a combo of cherry, plum, and vine ripe tomatoes. We threw is some chopped basil, mashed garlic, salt, pepper, and just a little balsamic. We brushed bread with olive oil, grilled the bread, piled on the tomatoes, and served. It was delicious.
Next time I’ll increase my tomato-to-bread ratio and maybe throw in some yellow tomatoes for aesthetics. The bread is personal. I happen to like a denser sourdough, especially because it holds up so well on the grill. But you can opt for a sliced baguette if you want it to be more bite-sized, or Italian if you want it to be airier. And while the grill is our go-to kitchen appliance during the summer, the bread can certainly be toasted in a regular oven or toaster.
I will make bruschetta again. And soon. So should you.
Neighborhood: Veggie Sides
We just returned from a few days in London where the food was better than I remember. We could not get enough of the ethnic food. Thai and Indian (or curry as they say over there) are two of our favorite cuisines and London does a masterful job with all things spice, coconut milk, and tandoor.
I also found that Londoners rely less on salt to bring out the flavor in their food, a welcome respite from the NY chefs whose heavy hands often overpower dishes.
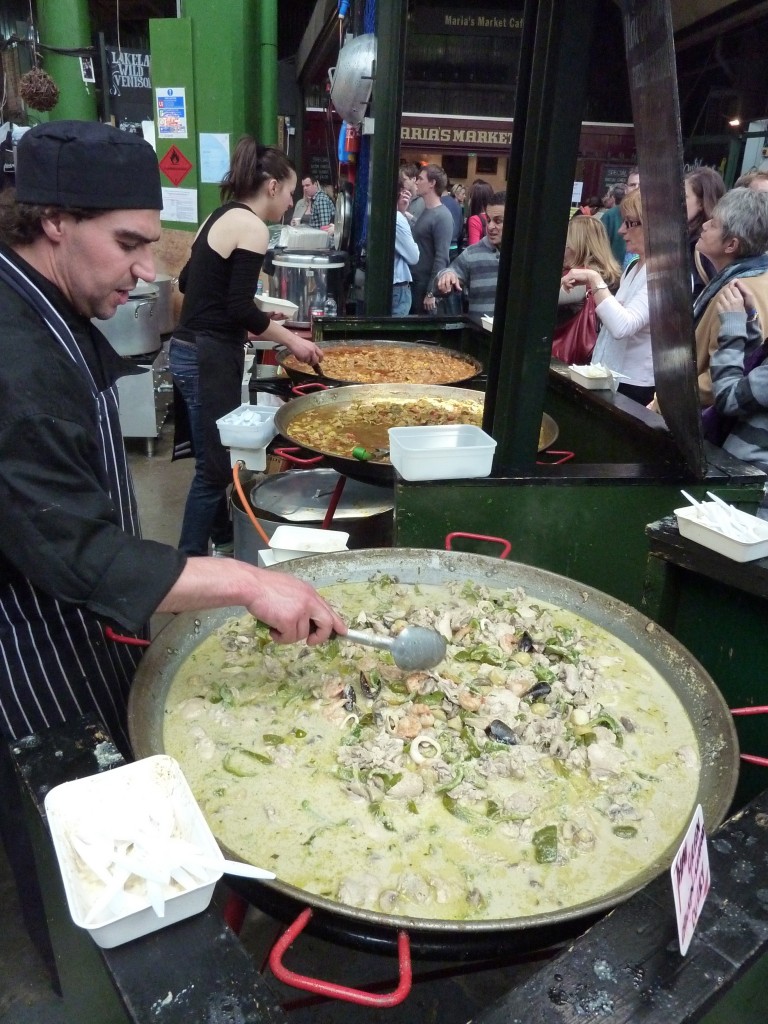
A trip to Borough Market (in sunshine nonetheless!) allowed us to sample many dishes from the dozens of food stalls. If you’re not bothered by the lines or crowds it is the ideal foodie activity. A snappy chorizo, a subtle haloumi burger, and a fish taco were all great, though the winner was definitely the Duck Rillette Sandwich.

Roast duck, a tangy aioli, and some rocket (the UK’s answer to arugula) are piled into a roll. Simple and delicious. And how can you not love that giant pan filled with succulent duck? The pans were a market mainstay. Check out the curries and paella below.
Another favorite meal was a brunch dish called Piggy Pudding (how can you not be a wee bit in love with it already?). Cumberland sausage nestled into a crock of Yorkshire Pudding had us smitten after just one bite. It’s served with a side of gravy but we found a drizzle of maple syrup elevated the dish to pure perfection (we’re such sweet-toothed Americans!). The sausage was some of the best we’ve had in years – full of pork and herbs, not sodium.

This Little Piggy is already looking forward to her next UK visit!
Neighborhood: Travel


